Security
Your sign-in settings live on the Security page, under Settings in the CalendarPipe sidebar. This is where you change the email address and password you sign in with, and where you set up multi-factor authentication.
Email
Change the email address associated with your CalendarPipe account. This is the email you use to log in and where account notifications are sent.
Changing your email requires verification. After submitting the change, you will receive a confirmation link at your new email address. You must click this link to complete the change. Until confirmed, your login email remains unchanged.
To change your email:
- Go to Settings → Security
- Enter the new address in Your New Email and again in Repeat Email
- Click Update Email Address
- Check your new email inbox for a confirmation link
- Click the confirmation link to activate the change
Password
Update your account password. This applies to accounts using email/password authentication.
If you signed up with Google, there is no CalendarPipe password to change. Your sign-in is managed by Google.
To change your password:
- Go to Settings → Security
- Enter the new password in New Password and again in Repeat New Password
- Click Update Password
Multi-Factor Authentication (MFA)
Add an extra layer of security to your account with time-based one-time password (TOTP) multi-factor authentication. When enabled, signing in also asks for a code from your authenticator app.
Enabling MFA
- Go to Settings → Security
- Find the Multi-Factor Authentication section
- Click Setup a new Factor
- A QR code will appear on screen
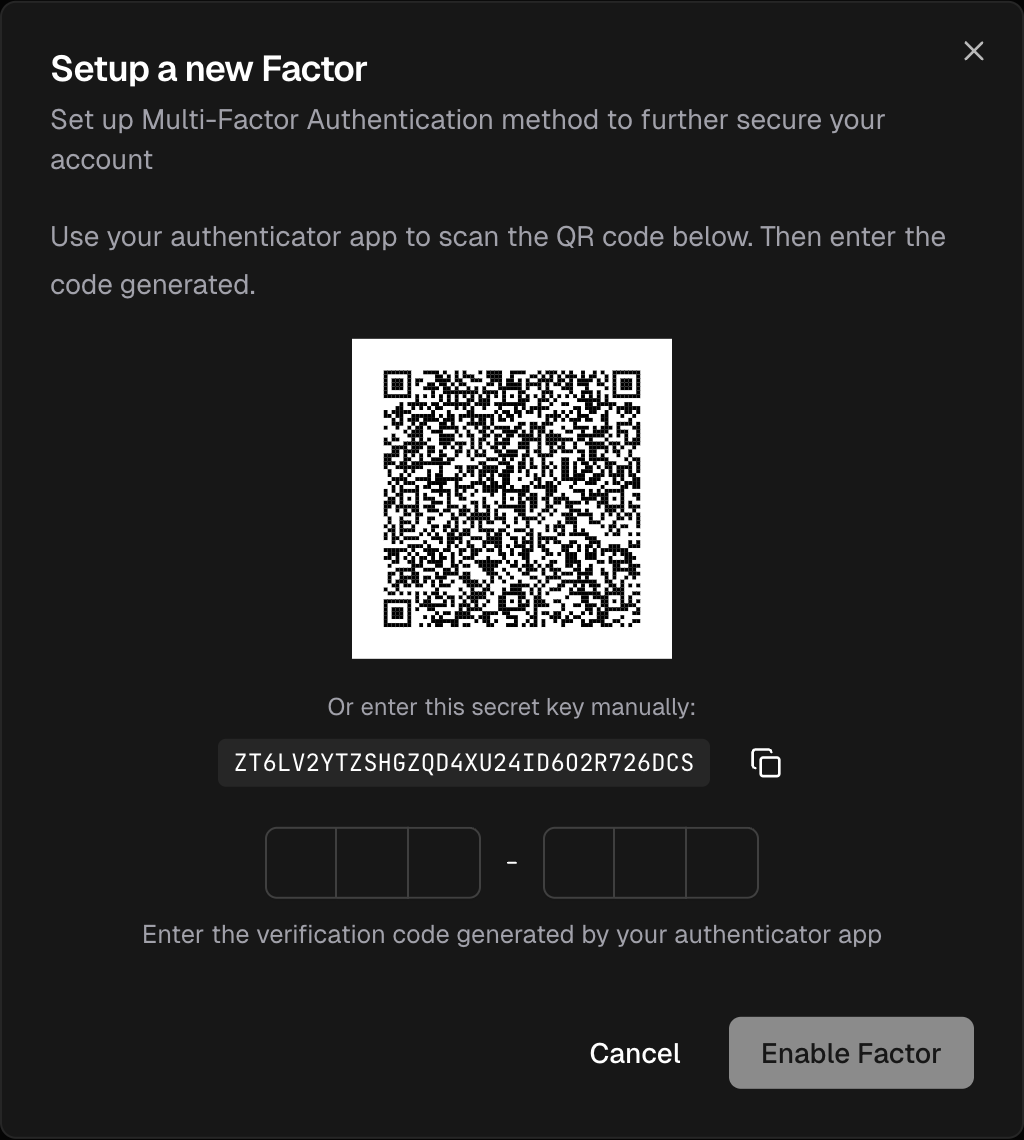
- Open your authenticator app (Google Authenticator, Authy, 1Password, or any TOTP-compatible app)
- Scan the QR code with your authenticator app, or enter the secret key shown below it manually
- Give the factor a name you will recognise later, such as the device it lives on
- Enter the 6-digit verification code shown in your authenticator app
If you lose access to your authenticator app, you will not be able to sign in. Keep the secret key shown during setup somewhere safe, such as a password manager, so you can add the factor to a new device.
Disabling MFA
- Go to Settings → Security
- Find the Multi-Factor Authentication section
- Click the × next to the factor you want to remove
- Confirm with Yes, unenroll factor